If you are about to start a project with Wifi functionality, this may be interesting for you:
As we have seen before, we will need two devices in this project:
- A Train receiver
- A signal emitter
For the train receiver, the idea was to use an ATMega chip and control the DC motor using a L293D chip (H bridge) thanks to the PWM on the AtMega. The AtMega would receive the signal from the Wifi module that we are about to attach, the Esp8266.
I started reading about the Esp8266 and it turned out that the Esp8266 already has a pic in it, and it is possible to program it. This way, I do not need to deal with the ATMega communication with the Wifi Module, and the device can be even smaller.
I am going to talk about how you will need to setup your hardware to create a confortable environment for developing your software. For programming an Esp8266 module, you will need the following hardware (as a basis):
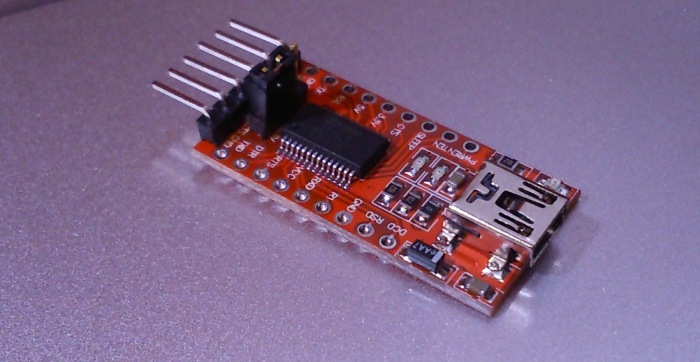
- FTDI (Usb to serial) connector.
- A breadboard or protoboard.
- Some wires
- Some 10K resistors
Optional but useful parts:
- Two push switches
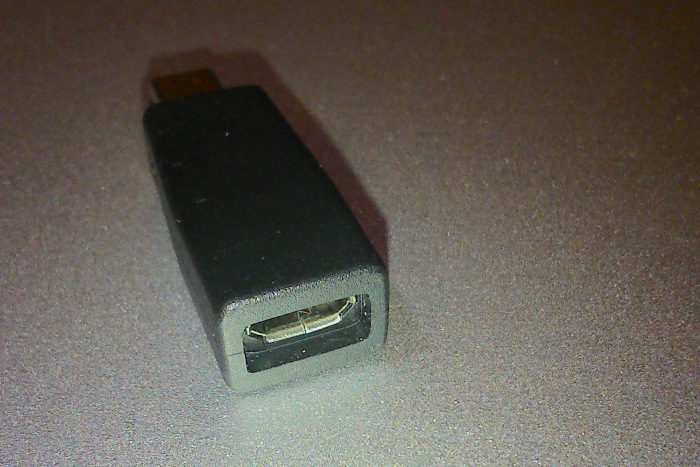
The FTDI will be required to send your data to your Esp8266. If you have an Arduino board, you can communicate with the Esp8266 by creating an extra Serial port, but in my tries, there where some random failures in the communication, so I would not use that way for sending a program to the Esp8266. The FTDI is a small device with a USB port at one side, and 6 pins for output at the other side. Usually they work at 5 V, but the Esp8266 requires 3.3V for power and levels. If you are about to buy one, please be sure to buy the one working at 3.3V. Here’s a pic of a FTDI:
The breadboard will help you do the connections. You won’t need a very big one, just a standard will be enough:

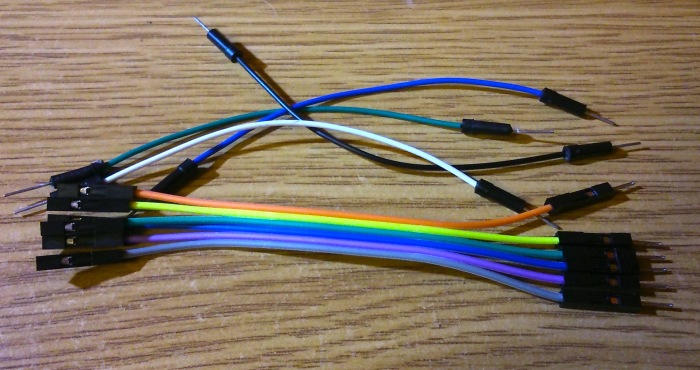
Wires are required to connect all components:
10K resistors required to connect some Esp8266 pins:

If you want to make your life easier, please get a pair of these push buttons:

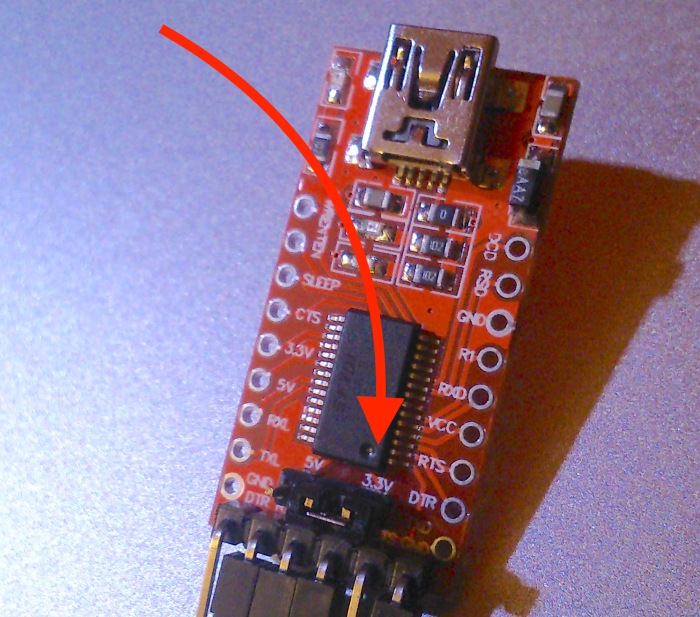
The scheme I used for programming the Esp8266 Rev 12 was the following:
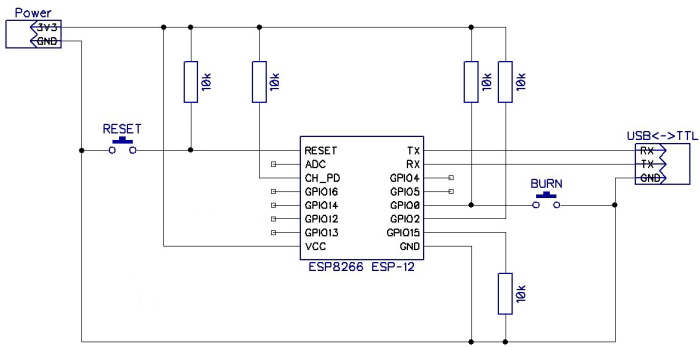
I have copied it from an image found on google images. The original circuit included a capacitor and another resistor at GPIO16, but I do not know why those are there:
I was using an external power supply, because I faced this issue when connecting to the FTDI:
- The Serial port was available on the computer, but when connecting with the Jumper on 3.3V on FTDI, the port just brakes and I cannot select it anymore. I need to restart my computer.
- If I use 5V I can burn the ESP8266.
However, these were all not real issues, the root cause was the following:

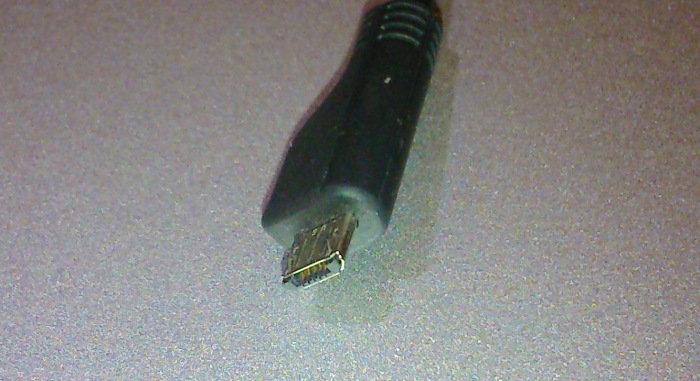
I was using an adapter from Micro-B to Mini-B, and sometimes it generates issues. This was because I was reusing a phone Usb wire:
Now, I can set the FTDI jumper to the 3.3V and connect to the ESP8266 without any external power supply:
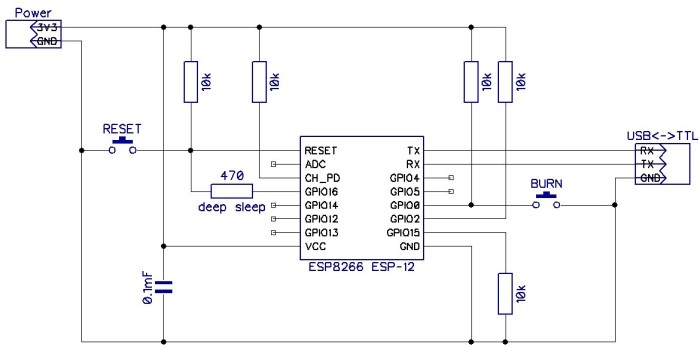
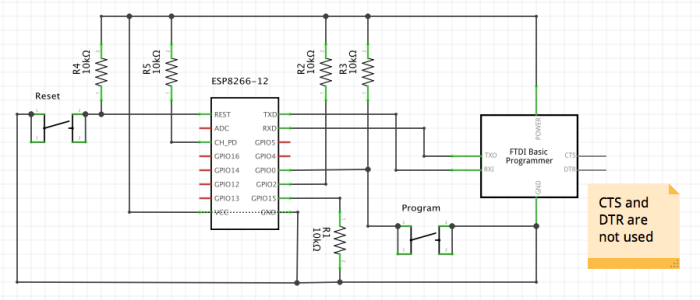
The final Schema that I am using is this:
If you do not have the push buttons, just leave the connections open and close the connection manually. You’ll know when to close the connection after reading the following paragraphs.
Update:
The ESP8266 works with this configuration, but it throws an exception when the WiFi connection is stablished. It looks like some connection needs to be improved (maybe WiFi needs extra power and makes the pic stop working). If you are about to program your ESP8266, please continue with the schema with External Power supply, till I find a solution.
The Esp8266, has different start modes. You can check which mode is started by connecting through Serial monitor (from Arduino Ide, or any other software), at 74880 baud rate:
 ets Jan 8 2013,rst cause:2, boot mode:(1,6)


 ets Jan 8 2013,rst cause:2, boot mode:(3,6)

load 0x40100000, len 612, room 16
tail 4
chksum 0x12
load 0x3ffe8000, len 788, room 4
tail 0
chksum 0x50
load 0x3ffe8314, len 264, room 8
tail 0
chksum 0x4a
csum 0x4a
This is the output that I get in my computer. In the first start, the mode (1,6) is programming. It will be ready to receive a new binary file to be written in the memory. In the second start, the mode is normal. You can see that there is more information, like the reason of the restart (in this case, reset button was pressed by me).
You can restart your device by grounding the RST pin. You can do it by closing the RESET connection, or for making your life easier, you can use the push button. You can also remove the power pin and connect it again.
If you would like to upload a new program to your device, you need to start it in programming mode. In order to do this, you must ground the GPIO0 before starting your device, or just restarting it. You can do this by closing the Burn connection and then restarting your device.
When you buy the ESP8266 the device includes a default firmware. This firmware allows communication via something called “AT commands”. Via serial communication, you can send pre-defined commands that will allow you set up a WiFi connection, receive and send data. This is the slave-mode for use this device, that I will not cover.
Once you upload your own code, the AT commands are not available anymore, but you can recover it if you need, by just uploading the default firmware that you can download from the Espressif website:
http://espressif.com/new-sdk-release/
In this link you will find the Software Development Kit, and I think the firmware is included there.
In next posts I will talk about how to upload your code to the device with your computer.
